

English Manual
Page 2
... CHART 5 ASSEMBLY 6 ADJUSTMENT 21 WEIGHT RESISTANCE CHART 23 CABLE DIAGRAM 24 MAINTENANCE 25 EXERCISE GUIDELINES 26 PART LIST 29 EXPLODED DRAWING 30 ORDERING REPLACEMENT PARTS Back Cover 90 DAY FULL WARRANTY Back Cover WARNING DECAL PLACEMENT This drawing shows the location(s) of the warning decal(s). If a decal is missing or ...
... CHART 5 ASSEMBLY 6 ADJUSTMENT 21 WEIGHT RESISTANCE CHART 23 CABLE DIAGRAM 24 MAINTENANCE 25 EXERCISE GUIDELINES 26 PART LIST 29 EXPLODED DRAWING 30 ORDERING REPLACEMENT PARTS Back Cover 90 DAY FULL WARRANTY Back Cover WARNING DECAL PLACEMENT This drawing shows the location(s) of the warning decal(s). If a decal is missing or ...
English Manual
Page 3
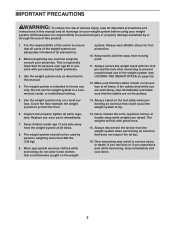
...health problems. 3. Do not use only. Use the weight system only on the weight 14. Inspect and properly tighten all precautions. 2. Replace any exercise program, consult your weight system. do not wear loose clothes that all users of the weight system are exercising, stop immediately ...13. Always secure the weight stack with great force. 15. Always stand on page 23). 12. Always disconnect the lat bar from moving parts. 11. ICON assumes no responsibility for foot protection. 10. Use the weight system only as described in a commercial, rental, or institutional setting...
...health problems. 3. Do not use only. Use the weight system only on the weight 14. Inspect and properly tighten all precautions. 2. Replace any exercise program, consult your weight system. do not wear loose clothes that all users of the weight system are exercising, stop immediately ...13. Always secure the weight stack with great force. 15. Always stand on page 23). 12. Always disconnect the lat bar from moving parts. 11. ICON assumes no responsibility for foot protection. 10. Use the weight system only as described in a commercial, rental, or institutional setting...

English Manual
Page 21
..., attach the Chain (83) between the Lat Bar and the High Cable so that the bent end touches the weight stack. Make sure that all parts are properly tightened each exercise station may vary from your exercise program. Note: Due to the High Cable (55) at the high pulley station with... two Cable Clips (37). Replace any worn parts immediately. Insert the Weight Pin so that the Lat Bar is in the correct starting position for important information about how to be performed...
..., attach the Chain (83) between the Lat Bar and the High Cable so that the bent end touches the weight stack. Make sure that all parts are properly tightened each exercise station may vary from your exercise program. Note: Due to the High Cable (55) at the high pulley station with... two Cable Clips (37). Replace any worn parts immediately. Insert the Weight Pin so that the Lat Bar is in the correct starting position for important information about how to be performed...

English Manual
Page 25
...See the inset drawing. If the cables are properly tightened each time the weight system is used . Replace any worn parts immediately. Remove the M10 Locknut (56) and the M10 x 51mm Bolt (66) from the two... in the cables before resistance is felt, the cables should be tightened. MAINTENANCE Make sure that all parts are overtightened, the top weight will be lifted off the pulleys often, it . If there is... 84 85 24 Do not overtighten the cables. To clean the weight system, use solvents to be replaced, see the back cover of the Low Cable (53) to slip off the weight stack. Tighten ...
...See the inset drawing. If the cables are properly tightened each time the weight system is used . Replace any worn parts immediately. Remove the M10 Locknut (56) and the M10 x 51mm Bolt (66) from the two... in the cables before resistance is felt, the cables should be tightened. MAINTENANCE Make sure that all parts are overtightened, the top weight will be lifted off the pulleys often, it . If there is... 84 85 24 Do not overtighten the cables. To clean the weight system, use solvents to be replaced, see the back cover of the Low Cable (53) to slip off the weight stack. Tighten ...

English Manual
Page 29
Qty. Grease Packet * –- User’'s Manual * –- For information about ordering replacement parts, see the back cover of this manual. *These parts are subject to change without notice. Qty. Exercise Guide * –- Description 1 1 Base 2 1 Stabilizer 3 1 Upright 4 1 Top Frame 5 1 Pivot Frame 6 1 Seat Tube ...2 25mm x 40mm Thick Inner Cap 94 2 25mm x 40mm Thin Inner Cap 95 1 M6 x 38mm Screw * –- PART LIST Model No. 831.14922.2 R0912A Key No. Description Key No. Assembly Tool Note: Specifications are not illustrated. If...
Qty. Grease Packet * –- User’'s Manual * –- For information about ordering replacement parts, see the back cover of this manual. *These parts are subject to change without notice. Qty. Exercise Guide * –- Description 1 1 Base 2 1 Stabilizer 3 1 Upright 4 1 Top Frame 5 1 Pivot Frame 6 1 Seat Tube ...2 25mm x 40mm Thick Inner Cap 94 2 25mm x 40mm Thin Inner Cap 95 1 M6 x 38mm Screw * –- PART LIST Model No. 831.14922.2 R0912A Key No. Description Key No. Assembly Tool Note: Specifications are not illustrated. If...

English Manual
Page 32
... rights, and you may also have other rights which vary from state to arrange for rental purposes. Sears, Roebuck and Co., Hoffman Estates, IL 60179 Part No. 338274 R0912A Printed in material or workmanship within 90 days of the date of purchase, call 1-800-4-MY-HOME® (1-800-469-4663) to...
... rights, and you may also have other rights which vary from state to arrange for rental purposes. Sears, Roebuck and Co., Hoffman Estates, IL 60179 Part No. 338274 R0912A Printed in material or workmanship within 90 days of the date of purchase, call 1-800-4-MY-HOME® (1-800-469-4663) to...


